
Can you install a basketball net yourself? Yes, you can! Installing a basketball net is a straightforward process that most people can do with basic tools and a little patience. Whether you’re replacing an old, worn-out net or setting up a new hoop, this guide will walk you through everything you need to know. We’ll cover basketball rim installation, replacing basketball net components, and the specifics of how to tie a basketball net securely. We’ll also touch upon basketball net fasteners, the process of installing breakaway rim net systems, and the variety of basketball hoop net types available. Get ready for outdoor basketball net installation, indoor basketball net setup, adjusting basketball net tension, and the best practices for basketball net material installation.
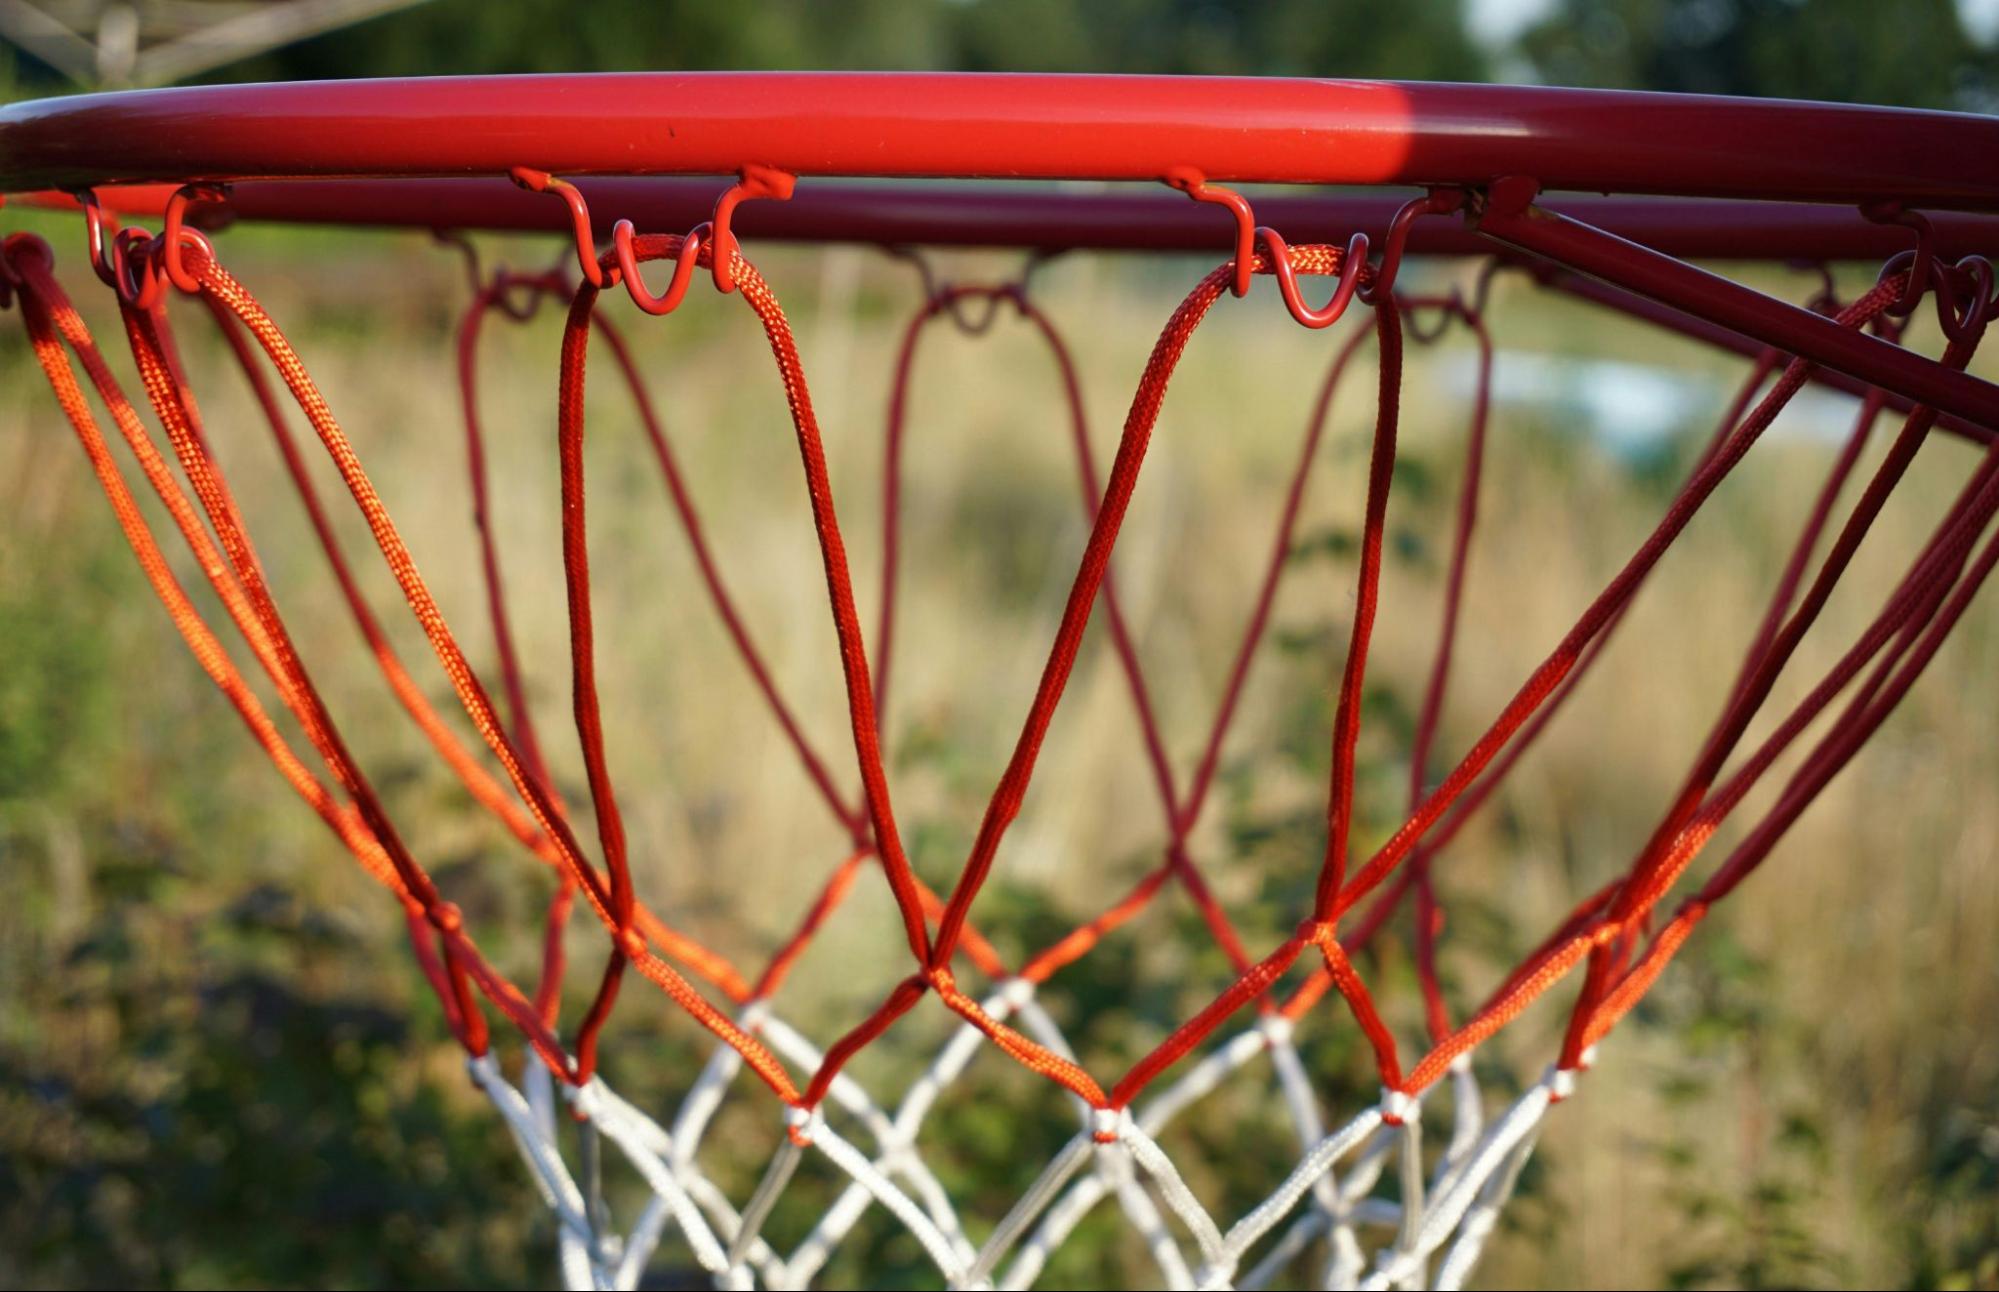
Image Source: cdn.shopify.com
Choosing the Right Basketball Net
Before you start, it’s important to pick the right net for your needs. The type of net you choose will depend on where you’ll be playing and how often.
Types of Basketball Nets
There’s a range of basketball hoop net types to consider:
- Nylon Nets: These are the most common and affordable. They are durable for casual play and suitable for both indoor and outdoor use, though they may fade in direct sunlight over time.
- Polyester Nets: Polyester nets are generally more durable and resistant to UV rays and moisture than nylon. They tend to last longer in outdoor environments.
- Chain Nets: Made of metal, these are extremely durable and produce a distinct “swish” sound. However, they can be heavier, wear down the rim over time, and are more expensive.
- Rope Nets: Often made of thicker cord, these offer a good balance of durability and feel. They are a popular choice for serious players.
- No-Knot Nets: These nets have loops that simply hook onto the rim, making installation very quick and easy.
What to Look for in a Basketball Net
- Durability: Consider how much use the net will get. For frequent play, a more robust material is better.
- Weather Resistance: If the hoop is outdoors, choose a net that can withstand sun, rain, and wind.
- Weight: Lighter nets can feel better when the ball goes through, but heavier nets might last longer.
- Ease of Installation: Some nets are easier to attach than others.
Preparing for Installation
Once you have your new net, it’s time to get ready. This involves gathering tools and making sure your basketball hoop is in good condition.
Essential Tools and Materials
You won’t need many special tools for this job. Here’s a basic list:
- New Basketball Net: Of course!
- Ladder or Stool: To reach the rim safely. Make sure it’s stable.
- Gloves (Optional): To protect your hands, especially if the old net is rough or the rim is dirty.
- Wire Brush or Cloth: For cleaning the rim.
- Pliers or a Flathead Screwdriver: May be helpful for removing old fasteners or stubborn old nets.
- Zip Ties or String (Optional): For temporary securing or for specific net types.
Inspecting Your Basketball Rim
Before you put on a new net, take a moment to check the rim itself. This is a key part of successful basketball rim installation.
- Condition of the Rim: Is it bent, rusted, or damaged? If the rim is significantly damaged, you might need to replace the entire rim assembly.
- Attachment Points: Count the number of hooks or loops on your rim. Standard rims have 12. This will tell you how many attachment points your new net needs.
- Breakaway Rim Check: If you have a breakaway rim, ensure the springs and hinges are working correctly. This is crucial for installing breakaway rim net systems.
Step-by-Step Guide to Installing Your Basketball Net
Now, let’s get down to the actual installation. We’ll cover general net installation and then specifics for different types.
General Net Attachment Process
This is the most common method for attaching most types of nets.
- Reach the Rim: Safely position your ladder or stool so you can comfortably reach the basketball rim.
- Remove the Old Net (If Necessary):
- If your old net is attached with loops or hooks, simply pull each loop off the rim’s attachment points.
- If it’s tied on, you might need to untie the knots. Pliers can help if the knots are tight or the material is frayed.
- Sometimes, old nets are secured with basketball net fasteners like U-shaped clips or zip ties. Carefully remove these.
- Clean the Rim: Use a wire brush or cloth to remove any dirt, rust, or debris from the rim. A clean rim ensures the new net attaches smoothly.
- Position the New Net:
- Find the top loop or opening of your new net.
- Place this opening over the rim.
- Attach the Net:
- Start attaching the net to the rim. Most nets have loops that you thread through the hooks or holes on the rim.
- Work your way around the rim, attaching one loop at a time.
- It’s often easiest to start at one point and then move directly opposite, then work outwards. This helps keep the net evenly spaced.
Attaching Different Net Types
- Nets with Loops: For standard nets with loops, simply hook each loop onto the corresponding point on the rim.
- Nets with Knots (How to Tie a Basketball Net): If your net doesn’t have pre-made loops or you’re using a rope net, you’ll need to tie it.
- Start by securing the first knot. A simple overhand knot or a square knot often works well. Ensure it’s tight against the rim.
- For subsequent ties, loop the net material through the next rim point.
- Pull the material taut, but not so tight that it distorts the rim or creates uneven tension.
- Tie off each point securely. The goal is for the net to hang evenly.
- Adjusting Basketball Net Tension is key here. You want the net to hang freely without being too loose or too tight. The weight of the ball should cause it to flex and create that satisfying swish sound.
- No-Knot Nets: These usually have specific hooks or clips. Simply align the net’s attachment points with the rim’s hooks and push or snap them into place.
Installing a Breakaway Rim Net
The process for installing breakaway rim net systems is very similar to a standard rim. The primary difference is ensuring you’re not applying excessive force that could damage the spring mechanism.
- Handle with Care: When attaching the net, avoid yanking or pulling too hard, especially near the breakaway mechanism.
- Even Attachment: Distribute the net attachment evenly around the rim to avoid putting uneven pressure on the springs.
- Check Functionality: After attaching the net, gently push down on the rim to ensure the breakaway feature still works smoothly.
Outdoor Basketball Net Installation Specifics
Outdoor basketball net installation requires a bit more attention to durability.
- Material Choice: Opt for polyester or rope nets, which are more weather-resistant.
- Secure Fastening: Ensure all attachment points are very secure to prevent the net from blowing away in strong winds.
- Regular Checks: Periodically check the net and fasteners for wear and tear caused by weather.
Indoor Basketball Net Setup
Indoor basketball net setup is generally simpler as you don’t have to worry as much about weather.
- Material: Nylon nets are perfectly fine for indoor use.
- Cleanliness: Ensure the gym or indoor space is clean to avoid unnecessary wear on the net.
- Tension: You can focus more on achieving the perfect swish sound with indoor nets, as durability against elements isn’t a concern.
Adjusting Basketball Net Tension
Proper adjusting basketball net tension is crucial for the look and feel of the net.
- Too Loose: A net that is too loose will sag excessively, making it difficult to see if a shot goes in and potentially leading to tangling. If your net has loops, try re-hooking them to a slightly tighter position if possible. If tied, you might need to retie knots a bit more snugly.
- Too Tight: A net that is too tight will look stretched and might not provide that satisfying “swish.” It can also put undue stress on the rim. Loosen any tied knots slightly or try re-hooking loops to a more relaxed position.
How to Tie a Basketball Net Correctly
When learning how to tie a basketball net, focus on consistency.
- Knot Type: Use a knot that won’t slip but is also not impossible to untie if you need to replace the net again. A double overhand knot or a fisherman’s knot can work well.
- Tension Consistency: Aim for similar tightness at each attachment point. This ensures the net hangs evenly.
- Securing the End: Always secure the end of your tie-off point so it doesn’t unravel.
Common Issues and Troubleshooting
Even with careful installation, you might encounter a few snags.
Net Not Fitting Properly
- Problem: The net seems too big or too small for the rim.
- Solution: Double-check that you have the correct size net for your rim (e.g., standard 12-loop net for a standard rim). If it’s slightly off, try to even out the slack by adjusting where you attach each loop or retie knots to compensate.
Fasteners Coming Loose
- Problem: The net loops or fasteners are slipping off the rim.
- Solution: For looped nets, ensure the loops are fully seated on the rim hooks. If they keep slipping, you might consider using small zip ties or strong string to reinforce the connection. For tied nets, ensure your knots are secure.
Uneven Net Hang
- Problem: The net hangs unevenly, with some parts much lower than others.
- Solution: This is usually due to uneven tension. Go around the rim and adjust the tightness of each attachment point. Start from opposite sides to balance the net.
Maintenance and Longevity
Taking care of your basketball net will extend its life.
Cleaning Your Basketball Net
- Routine Cleaning: For nylon or polyester nets, a simple hose-down can remove dust and dirt.
- Stubborn Grime: For tougher dirt, use mild soap and water with a soft brush. Rinse thoroughly.
- Chain Nets: Chain nets can be wiped down with a damp cloth.
Inspecting Net Material Installation
Periodically check the basketball net material installation for signs of wear.
- Fraying: Look for frayed edges or thinning material.
- Tears: Check for any rips or tears.
- Fastener Integrity: Ensure all hooks, loops, or ties are still securely in place.
If you notice significant wear, it’s time to consider replacing the net to ensure safety and proper gameplay.
Frequently Asked Questions (FAQ)
Q1: How often should I replace my basketball net?
A1: This depends on usage and the material. For casual backyard play with nylon nets, you might replace them every 1-3 years. For heavy use or outdoor conditions, you might need to replace them annually. Chain nets can last much longer.
Q2: Can I use a net designed for indoor use outdoors?
A2: While you can, it’s not recommended for longevity. Indoor nets (often nylon) are not treated to resist UV rays and moisture, so they will degrade much faster when exposed to the elements.
Q3: What are the best basketball net fasteners?
A3: For most nets, the integrated loops or hooks that come with the net are the best. If you need to reinforce or replace fasteners, heavy-duty zip ties or strong, weather-resistant cord are good options.
Q4: How do I know if my breakaway rim is installed correctly?
A4: A correctly installed breakaway rim should have springs that allow the rim to bend forward under pressure (like a dunk) and then return to its original position. When installing breakaway rim net, ensure you don’t overtighten any net attachments that could hinder this mechanism.
Q5: My new net feels too stiff. What should I do?
A5: Some new nets, especially thicker rope or polyester ones, can feel stiff. They usually soften up after a few uses and with exposure to weather. For now, ensure the adjusting basketball net tension is not too tight, allowing it to hang freely.
Q6: Is there a specific way to tie a basketball net for the best sound?
A6: While how to tie a basketball net affects tension, the sound is also heavily influenced by the net material and the rim itself. Generally, a net that hangs a bit loosely and is made of a traditional material like nylon or polyester will produce the classic “swish” sound. Avoid overly tight or heavy chain nets if sound is your priority.
Q7: I’m having trouble with the loops on my new net fitting the rim hooks. What can I do?
A7: Make sure you’re pushing the loop all the way onto the hook. Sometimes, a bit of wiggling or using a flathead screwdriver to gently guide the loop can help. Ensure your rim doesn’t have bent hooks. If the loops are slightly too small for your rim, consider using a different basketball net material installation or seeking a net with slightly larger loops.
By following these steps, you can confidently install or replace your basketball net, ensuring your hoop is ready for action!