
Want to learn how to draw a basketball player in action? Or perhaps you’re curious about how to draw a basketball hoop? This guide will show you how to draw playing basketball with simple steps suitable for beginners. We’ll cover everything from sketching a basketball player’s form to capturing the dynamism of a basketball in motion.
Drawing can seem tough, but with a little practice, anyone can learn. This beginner basketball drawing guide will help you bring your favorite sport to life on paper. We’ll break down the process into manageable steps, making it an easy basketball drawing experience.
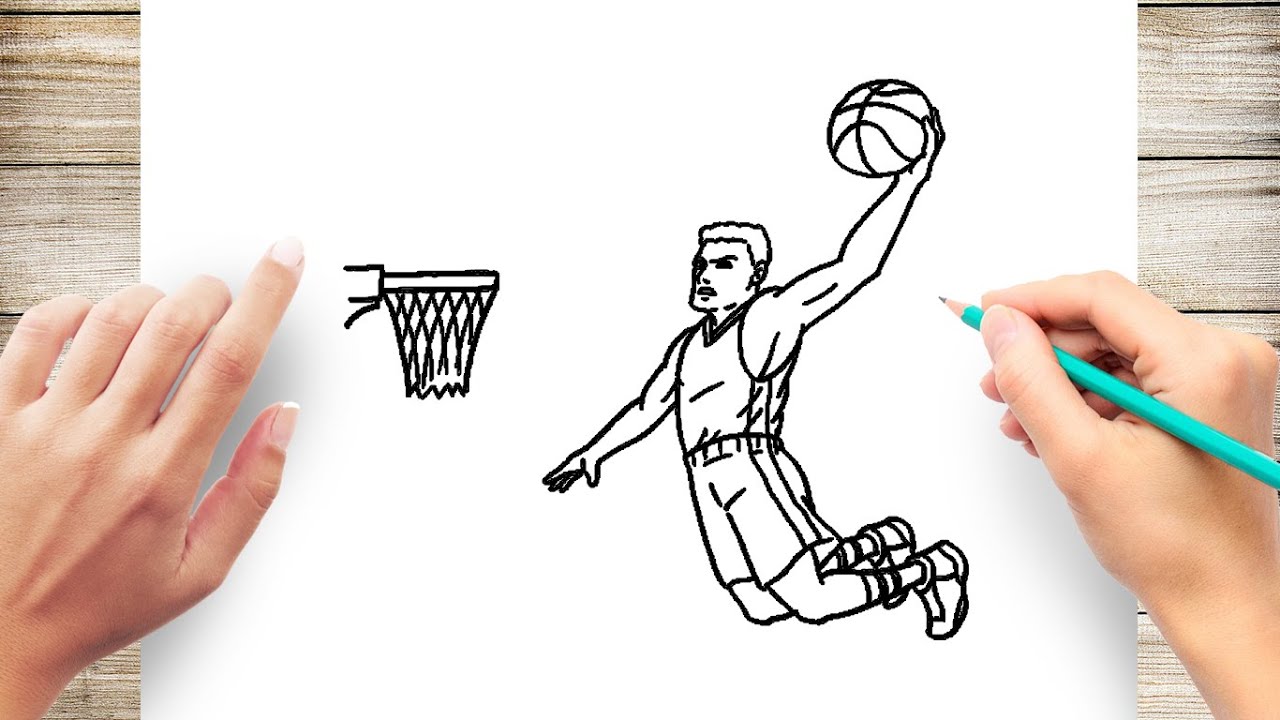
Image Source: i.ytimg.com
Getting Started: Your Basic Drawing Kit
Before we dive into sketching, let’s talk about what you’ll need. You don’t need fancy art supplies to start.
- Pencils: A few different pencils are helpful. A standard HB pencil is great for general sketching. A softer lead pencil (like a 2B or 4B) is good for darker shading, and a harder lead pencil (like an H or 2H) can be used for lighter initial outlines.
- Paper: Any drawing paper will do. Sketchpads are readily available and work perfectly.
- Eraser: A good quality eraser is a must. Kneaded erasers are great because they can be molded to pick up graphite gently, without damaging the paper. A standard pink or white eraser is also fine.
- Sharpener: Keep your pencils sharp for clean lines.
Fathoming Basketball Anatomy for Artists
To draw a basketball player, it helps to have a basic idea of how the human body moves, especially in sports. We don’t need to be doctors, but knowing a few key things makes drawing easier.
The Human Form: Simple Shapes
Think of the body as a collection of simple shapes:
- Head: An oval or circle.
- Torso: A rectangle or an oval, often wider at the shoulders and narrower at the waist.
- Limbs (Arms and Legs): Cylinders or long ovals.
- Joints (Shoulders, Elbows, Knees, Ankles): Circles where the shapes connect.
When drawing a player, remember that muscles create curves and bulges. For example, the thigh muscles are quite prominent.
Poses in Motion
Basketball players are always moving. To show this, think about:
- Action Lines: These are lines that follow the direction of movement. A swoosh behind a dribbling ball or a curved line along an arm can show speed.
- Body Bends: Players bend their knees to jump, crouch low to dribble, and twist their bodies to shoot. Exaggerating these bends can make the drawing more dynamic.
- Weight Distribution: A player jumping will have most of their weight on their toes. A player landing will have their knees bent to absorb the impact.
Sketching a Basketball Player: Step-by-Step
Let’s start with the core of our drawing – the player. This beginner basketball drawing guide focuses on simplicity.
Step 1: The Basic Skeleton
Start with your HB pencil. Lightly sketch the basic shapes of the body. Imagine a stick figure, but with shapes attached.
- Draw a circle for the head.
- Draw a long oval for the torso.
- Connect the torso to the head with a shorter oval for the neck.
- Add circles for the shoulders and hips.
- Draw lines for the arms and legs, and circles for the elbows, wrists, knees, and ankles. This is your basic pose.
Step 2: Adding Volume
Now, give those lines some form.
- Use your pencil to thicken the lines, turning them into cylinders for arms and legs and adding bulk to the torso. Think about where the muscles would be.
- Draw a simple oval for the basketball itself.
Step 3: Refining the Form
Let’s make it look more like a person.
- Smooth out the connections between the shapes.
- Add details like hands and feet. For hands, you can start with a basic mitten shape and then add finger lines. Feet can be simple wedge shapes.
- Draw a simple jersey and shorts. Don’t worry about intricate details yet.
Step 4: Adding Action
This is where we make the drawing exciting!
- Dribbling: If your player is dribbling, draw the ball slightly below their hand. Add a curved line to show the ball hitting the ground or being pushed down.
- Shooting: If they are shooting, draw the ball above their head or near the hoop. Show the arm extended.
- Jumping: Bend the knees and draw the arms reaching up. You can add action lines behind the legs or the ball.
Step 5: Detailing and Shading
Now for the finishing touches.
- Facial Features (Optional): You can add simple eyes, a nose, and a mouth if you want, or keep it more stylized.
- Jersey Details: Add numbers or team logos.
- Shading: To make your player look more three-dimensional, add shading. Darken areas that would be in shadow, like under the chin, the inside of bent limbs, or the side of the torso away from your imagined light source. Use your softer pencil for darker areas.
How to Draw a Basketball Hoop
No basketball game is complete without a hoop! Drawing a basketball hoop is quite straightforward.
Step 1: The Backboard
- Start with a large rectangle for the backboard. You can angle it slightly to make it look like it’s attached to a pole.
Step 2: The Rim and Net
- From the backboard, draw a circle for the rim. It doesn’t need to be perfectly round, as perspective can make it look like an oval.
- Connect the rim to the backboard with two short lines (the support arms).
- Draw the net hanging down from the rim. Start with a few curved lines going down, and then add more intersecting lines to create the net effect.
Step 3: Adding Depth
- Add a bit of thickness to the backboard and rim.
- Shade the rim and backboard to give them volume. The bottom of the rim and the backboard might be darker.
How to Draw a Basketball in Motion
Capturing the energy of a basketball is key to a dynamic drawing.
Step 1: The Basic Sphere
- Start with a perfect circle. This is your basketball.
Step 2: Adding the Lines
- Draw two curved lines that wrap around the sphere. One should go from side to side, and the other from top to bottom, crossing near the center. These represent the seams of the ball.
- Add smaller curved lines to indicate the texture and the panels of the ball.
Step 3: Showing Motion
This is where the magic happens!
- Dribbling: Draw the ball slightly distorted, perhaps a bit flattened at the bottom where it hits the court, or with a subtle curve to show it’s rolling. Add a “motion blur” effect by smudging the edges or drawing a few faint, curved lines trailing behind it.
- Flying: If the ball is in the air, it can be a perfect circle, but you can add a slight blur or speed lines to show its trajectory. Think about the arc it’s making.
- Bouncing: Show the ball mid-bounce, with the bottom slightly flattened and perhaps a slight upward curve.
Drawing Basketball Dribbling
Dribbling is a fundamental skill. Let’s learn how to draw it.
Step 1: The Player’s Stance
- Draw your player in a low, ready stance. Knees bent, back slightly curved.
Step 2: Positioning the Ball
- Place the basketball near the player’s hand, usually slightly in front and to the side.
Step 3: Showing the Action
- Draw the hand reaching down towards the ball, or just coming up from pushing it down.
- To show the downward push, draw the ball slightly compressed at the bottom.
- Add a slight curve to the ball’s path.
- Use light, curved lines around the ball to suggest speed and motion. You can also smudge the edges slightly if you’re using shading.
Easy Basketball Drawing Techniques
Here are some tips to keep your drawings simple and effective.
Use Basic Shapes
As mentioned, breaking down complex forms into simple shapes is your best friend. This applies to players, the ball, and the hoop.
Focus on Key Elements
You don’t need to draw every single detail. Focus on the pose, the ball, and the general environment.
Stick Figures as a Base
For very quick sketches or to plan a pose, a well-drawn stick figure with action lines can be incredibly useful.
Contour Drawing
Try drawing the outline of your subject without lifting your pencil. This helps you focus on the shape and flow of the basketball player.
Gesture Drawing
This is about capturing the energy and movement quickly. Don’t worry about perfection, just the feeling of the pose.
Adding Detail for a Realistic Basketball Drawing
If you want to move beyond simple sketches and aim for a more realistic basketball drawing, here’s how to add more detail.
Basketball Anatomy Refined
- Musculature: Observe how muscles bulge and stretch during movement. For a player dribbling low, the quadriceps (front of the thigh) and calves will be engaged. When shooting, the deltoids (shoulder muscles) and triceps will be prominent.
- Proportions: Use a reference image or study human proportions. The average human head is about 7.5 heads tall, but athletes might be taller.
- Clothing Folds: Fabric doesn’t hang perfectly. When a player bends their knees, there will be folds and creases in their shorts and jersey. Study how fabric behaves.
The Basketball Texture
- The surface of a basketball is dimpled. You can suggest this with small dots or short, curved lines scattered across the ball’s surface.
- Shading is crucial for realism. Think about where the light is coming from. The side facing the light will be brighter, while the opposite side will be in shadow. Use soft transitions between light and dark areas.
The Court and Environment
- Court Lines: Add the basic lines of a basketball court – the free-throw line, the three-point line, and the center circle. Use a ruler for straight lines to maintain accuracy.
- Shadows: The player will cast a shadow on the court. This is a great way to ground your drawing and add realism. The shadow will be distorted by the court lines and the player’s pose.
Drawing Basketball Moves: Capturing the Action
Let’s explore how to draw some specific basketball moves.
Shooting
- Pose: Draw the player with knees bent, ready to jump or push off. The shooting arm is usually bent at the elbow, with the ball resting on the fingertips.
- Ball Placement: The ball should be positioned near the forehead or above the head, ready for release.
- Follow-Through: Show the arm extending upwards and the wrist flicking forward to impart spin on the ball. Add a subtle blur or speed lines to the ball as it leaves the hand.
Passing
- Pose: A player passing might be lunging forward, turning their body, or standing ready.
- Ball Position: The ball will be held in both hands, ready to be pushed or thrown.
- Motion: Use action lines to show the direction of the pass. The player’s body should be angled towards the direction of the pass.
Layup
- Approach: Draw the player running towards the basket.
- Jump and Ball: The player will jump off one foot, bringing the opposite knee up. The ball is held in one hand, extended upwards towards the backboard.
- Release: Show the ball being gently pushed off the backboard. You can show the hand releasing the ball.
Tips for Improving Your Drawings
- Practice Regularly: The more you draw, the better you’ll get. Even 15-20 minutes a day makes a difference.
- Use References: Look at photos or videos of basketball players in action. Study their poses, movements, and how their clothes drape.
- Don’t Be Afraid to Erase: Mistakes are part of learning. Erase and redraw until you’re happy with the result.
- Experiment with Different Pencils and Techniques: Try out different shading methods or line weights to see what works best for you.
- Focus on One Element at a Time: If you’re struggling with a specific pose, just practice drawing that pose repeatedly.
Frequently Asked Questions (FAQ)
Q: What is the best way to start drawing a basketball player?
A: Start by breaking the player’s body down into simple shapes like circles, ovals, and rectangles. This creates a basic framework before adding details.
Q: Can I draw a basketball player without knowing much about anatomy?
A: Yes! While knowing some anatomy helps, you can create convincing figures by observing references and focusing on gesture and proportion. Simple shapes and a focus on movement are key for beginners.
Q: How do I make my basketball drawing look dynamic?
A: Use action lines to show speed and movement. Exaggerate bends in the body, and show the flow of limbs and the ball. Shading can also add depth and make the drawing feel more alive.
Q: What are some easy ways to draw a basketball?
A: Start with a perfect circle. Then, add the two curved seam lines that wrap around the ball. For motion, you can slightly distort the shape or add speed lines.
Q: How can I improve my realistic basketball drawing skills?
A: Use detailed reference photos. Pay close attention to musculature, fabric folds, and how light and shadow fall on the player and the ball. Practice shading techniques to create smooth transitions.
Q: Is there a specific order for drawing a basketball hoop?
A: It’s usually easiest to start with the backboard, then draw the rim, and finally the net. Adding support arms connects the rim to the backboard.
By following these steps and practicing regularly, you’ll find yourself drawing playing basketball with more confidence and skill. Happy sketching!