
Can you build a basketball court yourself? Yes, you can build a basketball court yourself with careful planning, the right materials, and a bit of effort. This guide will walk you through the process of creating your own DIY basketball court, whether it’s an outdoor basketball court or if you’re considering an indoor basketball court construction. We’ll cover everything from basketball court planning and basketball court installation to basketball hoop setup and ongoing basketball court maintenance.
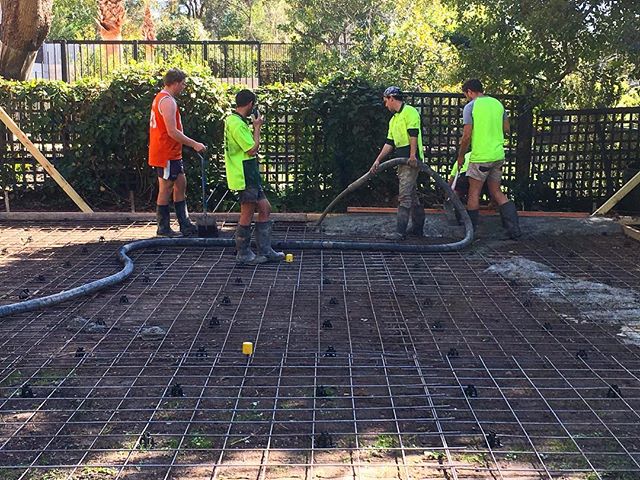
Image Source: static.msfsports.com.au
Phase 1: Planning Your Basketball Court
Before you even think about picking up a shovel, solid basketball court planning is crucial. This phase sets the foundation for a successful project.
Determining Your Location and Size
The first step is to decide where your court will go. Consider these factors:
- Available Space: How much room do you realistically have?
- Sunlight: Try to orient the court so the sun isn’t directly in players’ eyes during peak playing times.
- Drainage: Ensure the area has good drainage to prevent water from pooling on the court.
- Obstructions: Are there trees, fences, or buildings that will interfere with play?
Standard Basketball Court Dimensions
Understanding basketball court dimensions is vital. A full-size NBA court is 94 feet long and 50 feet wide. For a DIY basketball court, you can scale this down.
- Regulation Size (NBA/WNBA): 94 feet x 50 feet
- College Size: 94 feet x 50 feet
- High School Size: 84 feet x 50 feet
- Youth Size: Varies, but a common size is 74 feet x 42 feet.
Even if you can’t fit a full court, a half-court or even a shooting area can be incredibly enjoyable. The key is to create a safe and functional playing space.
Budgeting for Your Project
Building a basketball court can range from a few hundred dollars for a very basic setup to tens of thousands for a premium, professional-grade court. Your budget will influence your choices in basketball court materials and basketball hoop setup.
- Surface: Asphalt, concrete, or specialized outdoor court tiles.
- Fencing: If needed for security or containing balls.
- Lighting: For evening play.
- Hoop and Backboard: Quality varies greatly.
- Labor: If you hire any professionals.
Choosing Your Surface Material
The surface is arguably the most important decision you’ll make. Your choice impacts cost, durability, and playability.
Asphalt
- Pros: Relatively affordable, good durability, smooth playing surface.
- Cons: Can crack over time, requires sealing, can get hot in direct sun.
- Typical Cost: $3-$8 per square foot.
Concrete
- Pros: Very durable, can be poured in custom shapes, long-lasting.
- Cons: More expensive than asphalt, prone to cracking if not properly installed with expansion joints, can be very hard on joints.
- Typical Cost: $5-$10 per square foot.
Outdoor Sports Tiles (Polypropylene)
- Pros: Excellent drainage, customizable colors, can be installed over existing surfaces, forgiving on joints, easy to repair.
- Cons: More expensive upfront, can be noisy, may require a solid base underneath.
- Typical Cost: $5-$15 per square foot.
Acrylic Coating (Over Asphalt or Concrete)
- Pros: Provides color, texture, and UV protection. Can fill minor cracks.
- Cons: Adds to the overall cost, requires professional application for best results.
- Typical Cost: $1-$3 per square foot for coating only.
Natural Grass or Sand
- While possible for casual play, these are not suitable for a serious basketball court installation and will not provide the bounce or consistent surface required for the sport.
Phase 2: Preparing the Site
Proper site preparation is key to a long-lasting and functional court.
Excavation and Grading
You’ll need to excavate the area to create a level base. The depth will depend on your chosen surface material and the type of base you’ll install.
- Excavation Depth: Typically 6-10 inches for asphalt or concrete, accounting for the base material and the surface itself.
- Grading: The area must be perfectly level or have a slight slope (about 1% for drainage) away from any structures. Use a transit level or laser level for accuracy.
Base Material Installation
A solid base is crucial for preventing cracking and ensuring a stable playing surface.
- Gravel Base: A layer of crushed stone (typically 3/4-inch aggregate) is spread over the excavated area. This provides excellent drainage and a stable foundation.
- Compaction: Each layer of gravel must be thoroughly compacted using a plate compactor or roller. Aim for at least 4-6 inches of compacted base material.
Edging and Formwork
If you’re pouring concrete or asphalt, you’ll need to create forms to contain the material and define the court’s edges.
- Materials: Treated lumber (2x4s or 2x6s) or specialized concrete forms.
- Installation: Secure the forms firmly to the ground to withstand the pressure of the wet concrete or asphalt. Ensure they are level and square.
Phase 3: Installing the Court Surface
This is where your court starts to take shape.
Pouring Concrete
If you choose concrete, this is a job often best left to professionals due to the weight, speed, and finishing required.
- Delivery: Concrete trucks will pour the mix into your forms.
- Screeding: A screed board is used to level the concrete.
- Floating: This process smooths the surface.
- Troweling: For a smoother finish.
- Expansion Joints: Crucial for concrete to prevent cracking as it expands and contracts with temperature changes. These should be cut or formed at regular intervals.
- Curing: Concrete needs to cure for several days, keeping it moist during the process.
Laying Asphalt
Asphalt is typically laid by professionals using specialized equipment.
- Delivery and Spreading: Hot asphalt mix is delivered by truck and spread evenly with an asphalt paver.
- Rolling: Heavy rollers compact the asphalt, creating a dense and smooth surface.
- Curing: Asphalt cures relatively quickly, but it’s best to avoid heavy use for a few days.
Installing Outdoor Sports Tiles
This is a more manageable DIY option.
- Preparation: Ensure the base is clean, level, and free of debris.
- Layout: Start laying tiles from a corner, following the manufacturer’s instructions. Most tiles interlock like puzzle pieces.
- Cutting: You may need to cut tiles to fit edges or around obstacles. A jigsaw or circular saw with a fine-tooth blade works well.
- Seating: Once laid, gently tap the tiles with a rubber mallet to ensure they are fully seated.
Phase 4: The Basketball Hoop Setup
A well-installed hoop is essential for the experience. There are several types to consider.
Types of Basketball Hoops
- In-Ground Poles: The most common and stable type for outdoor courts. They are anchored directly into the ground.
- Direct Burial: The pole is set directly in concrete.
- Anchor Kit: The pole attaches to a pre-set anchor system in concrete. This allows for easier removal or replacement.
- Wall-Mounted: Hoops attached to a sturdy wall or building. Requires significant structural support.
- Portable Hoops: While convenient, these are generally not recommended for a permanent court as they lack the stability of in-ground options.
Choosing Your Hoop System
When selecting a system, consider:
- Adjustability: Height adjustability is great for different player ages and skill levels.
- Backboard Material: Acrylic, polycarbonate, or tempered glass offer different levels of durability and rebound quality.
- Rim Type: Breakaway rims are safer and more forgiving.
- Pole Strength: A thicker pole is more stable and less prone to vibration.
Installation Process for In-Ground Hoops
This is a critical step for basketball hoop setup.
- Marking the Location: Determine the exact spot for the pole based on your court layout. Ensure it’s the correct distance from the baseline.
- Digging the Hole: The hole size depends on the pole manufacturer’s recommendations and local frost line. Typically, a hole 2-3 feet deep and 18-24 inches in diameter is needed.
- Setting the Anchor (if applicable): If using an anchor kit, pour concrete into the hole, embed the anchor system, and ensure it’s perfectly plumb (vertical) using a level. Let the concrete cure completely (usually 24-72 hours).
- Attaching the Pole: Once the concrete is cured, attach the pole to the anchor system or directly bury it if that’s the method.
- Installing the Backboard and Rim: Follow the manufacturer’s instructions precisely. This usually involves attaching the backboard to the pole extension arm and then mounting the rim.
- Final Adjustments: Ensure the hoop is at the correct height (10 feet for regulation) and perfectly level.
Phase 5: Finishing Touches and Court Markings
Now for the details that make it a true basketball court.
Line Painting
Accurate lines are essential for the game.
- Materials: Specialized outdoor court marking paint or tape.
- Tools: Measuring tape, chalk line, straight edge, and brushes or rollers.
- Layout:
- Baseline: The boundary line at each end of the court.
- Sidelines: The boundary lines along the length of the court.
- Centerline: Divides the court into two halves.
- Free-Throw Line: 15 feet from the front of the backboard.
- Three-Point Line: The arc at the edge of the court. NBA, NCAA, and FIBA lines have different dimensions.
- Key/Lane: The rectangular area under the basket.
Common Basketball Court Line Dimensions (Approximate)
| Line Name | Distance from Baseline | Width of Line |
|---|---|---|
| Baseline | 0 feet | 2 inches |
| Sideline | N/A | 2 inches |
| Centerline | Half court length | 2 inches |
| Free-Throw Line | 15 feet from backboard | 2 inches |
| Key (Lane) | N/A | 2 inches |
Note: Three-point line distances vary significantly by league.
Optional Additions
- Lighting: For night play, consider installing floodlights.
- Fencing: To keep balls within the court area.
- Bench Area: For players to rest.
- Scoreboard: For more serious play.
Phase 6: Basketball Court Maintenance
Regular basketball court maintenance will ensure your court lasts for years to come.
Regular Cleaning
- Sweep or blow off leaves, dirt, and debris regularly.
- Wash down the surface with a hose and mild detergent as needed.
Surface Checks and Repairs
- Asphalt: Re-seal every 2-3 years to protect against weather and UV damage. Fill any small cracks with asphalt crack filler.
- Concrete: Seal concrete surfaces to protect against stains and water damage. Repair any new cracks promptly with concrete crack filler.
- Sports Tiles: Clean individual tiles as needed. Replace any damaged tiles.
Hoop and Net Maintenance
- Check the tightness of all bolts on the hoop and backboard.
- Replace worn or broken nets promptly.
- Lubricate any moving parts on adjustable hoops.
Indoor Basketball Court Construction Considerations
While the principles are similar, indoor basketball court construction has unique aspects.
- Subfloor: Typically, a sprung wooden floor designed for athletic performance is used. This requires specialized subfloor systems (e.g., sleeper systems, resilient pads) for shock absorption and player comfort.
- Ventilation and HVAC: Proper air circulation is crucial to prevent moisture buildup and maintain consistent temperatures.
- Lighting: Overhead lighting must be sufficient for play without glare.
- Ceiling Height: A minimum ceiling height is required, especially for higher levels of play, to accommodate shots.
- Wall Padding: Walls around the court should be padded for safety.
- Resurfacing: While not the same as outdoor, indoor wooden courts may require sanding and refinishing periodically, which is a form of basketball court resurfacing.
Frequently Asked Questions (FAQ)
How much does it cost to build a basketball court?
The cost varies widely. A basic asphalt half-court with a portable hoop could cost a few thousand dollars. A full-size, professional-grade concrete court with a high-quality in-ground hoop could range from $20,000 to $60,000 or more, depending on site conditions and material choices.
Do I need permits to build a basketball court?
In most areas, yes. You will likely need to check with your local building department for permits related to excavation, concrete pouring, and potentially electrical work if you install lighting.
How long does it take to build a basketball court?
From planning to completion, it can take anywhere from a few weeks to several months. The actual installation of the surface might take a week or two, but excavation, base preparation, curing times, and hoop installation all add to the timeline.
Can I build a basketball court on a slope?
You can, but it requires significant grading and potentially retaining walls to create a level playing field, which adds to the cost and complexity. It’s generally easier to build on an already level or gently sloping area.
What is the best surface for an outdoor basketball court?
For durability and playability, concrete and asphalt are the most common and reliable choices. Outdoor sports tiles offer a good alternative with better drainage and are easier on the joints, but often come with a higher upfront cost.
Building your own basketball court is a rewarding project. By carefully following these steps, you can create a fantastic space for recreation and exercise right in your own backyard. Enjoy the game!